
 Everyone loves them, everyone wants one, and almost everyone is totally intimidated by them. No, not a pet llama, though the same could also be said of those.
I’m talking about gallery walls! They ARE intimidating, but they are so very worth it.
There’s a lot of steps to get to that Pinterest-perfect display. But once you get the courage to execute it, a well-planned gallery wall becomes a meaningful and gorgeous addition to your home.
I’m here to take some of the mystery, and hopefully a lot of the stress, out of this project.
Step 1. Frames or Photos?
Designing a gallery wall can be a bit of a chicken or the egg situation. Do you start with the frame or the picture? Honestly, either way works great. But it is important to decide a course of action and go from there.
- Start with the frames. Perhaps you’ve just had family pictures taken and know you want to compile them into a gallery wall. Or maybe all the photos you want to use are stored digitally. This is the perfect situation to find frames you like and then order prints to fill them.
- Start with the pictures. Some people have collected family pictures over the years that they wish to incorporate into a gallery wall. In this instance, it’s best to begin with the prints you already have and go from there.
Need inspiration? Pinterest.com has compiled a list of gallery wall pins to get the ideas flowing.
Step 2. Determine Your Style
Just like picking any artwork for your home, the selections for your gallery wall should reflect your own personal style and coordinate with the decor.
- Classic look. I typically consider gallery walls that are very symmetrical and uniform to have a classic look. These are usually comprised of pictures that are the same size, or frames that match (or both) and the items are hung in nice neat rows. This is such a simple but elegant way to display photos.
- Whimsical look. This is more my style. I love to mix and match frames, find cute little signs to add in and incorporate some pops of color and interesting patterns into the mix. This eclectic style really lets you add a personal flair.
Check out this slideshow from bhg.com for some gorgeous examples of how gallery walls can look and feel so versatile.
Step 3. Curate the Design Elements
This means it’s time to go shopping! Now that you have an idea of how you want your gallery wall to look you must pull the pieces together to create it.
 If you’re buying new frames for the project, look for shapes and colors that coordinate, even if you don’t necessarily want them to match. Floating frames are always interesting. Hanging frames from a leather strap or hardware adds an extra element. This is where your style can shine!
Along with framed photos I like to add in some three dimensional elements like a wreath or arrow and some fun signs or initials to make it more personal. These items are easily acquired at any of your local home decor stores. My go-to’s are Hobby Lobby, Home Goods, Target, Kirklands….it seems like I’m always picking up something that I know will work perfectly in my next gallery wall.
Gallery walls have become so popular that many retailers, such as target.com, have begun listing items on their websites grouped together to form a gallery wall. All you have to do is find the style you like, add to cart and have it shipped to your home!
Step 4. Design It
Here’s where it tends to get tricky for most people. You have gathered pictures and accents for the wall and it’s time to figure out how to arrange them.
I find that the easiest way to get a feel for how the completed project will look is to lay everything out on the floor. Arrange, rearrange, mix and match until you have a configuration that is pleasing to the eye and the approximate size of the wall you’re working with. Take a picture of the mock layout so you have a reference then begin hanging.
If there’s no space to lay it out on the floor, I will take the biggest item, hang it where I want the focal point to be then build off of that. It usually all falls into place as I’m going along and turns into just what I’ve imagined.
Step 5. Admire Your Gallery Wall
You did it! That wasn’t so hard, was it? Hopefully there’s no extra holes in the wall, everything has found its place and all fingers and thumbs are accounted for. If not, that’s what band-aids and spackle are for, am I right?
Gallery walls have been gaining popularity for the past few years but this is a trend I see sticking around. These are really a timeless showcase of the most beautiful artwork – your loved ones -in your home. So don’t be afraid to put in the work and design a gallery wall…..or one in every room!
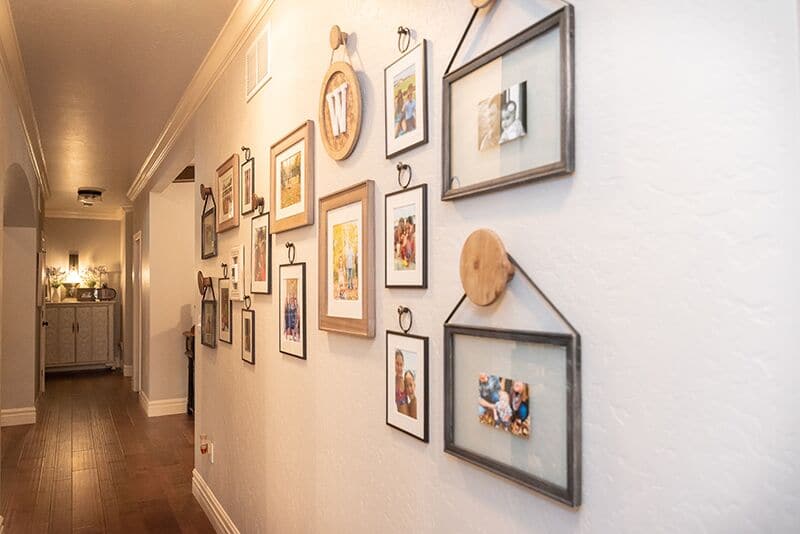
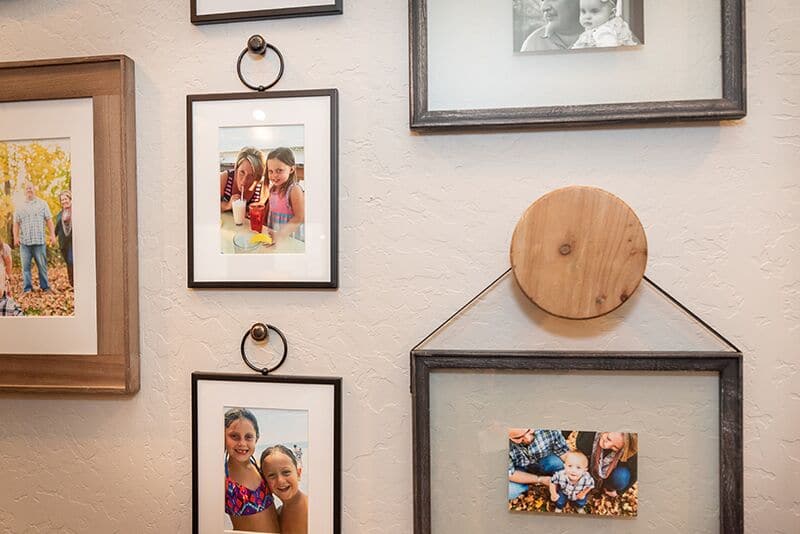
Still feel like this is more than you want to take on? That’s okay. Call a professional and have them do it! I’m asked to do a gallery wall in 90 percent of the homes I decorate. Good thing for me, I love putting these together.
I’m going to leave you with some photos of a gallery wall I recently did for a client. This is the feature I’m most proud of in the whole house. They have some really fun pictures hanging in their hallway now. Everyone who visits their house is going to this joyous reflection of their wonderful family.