
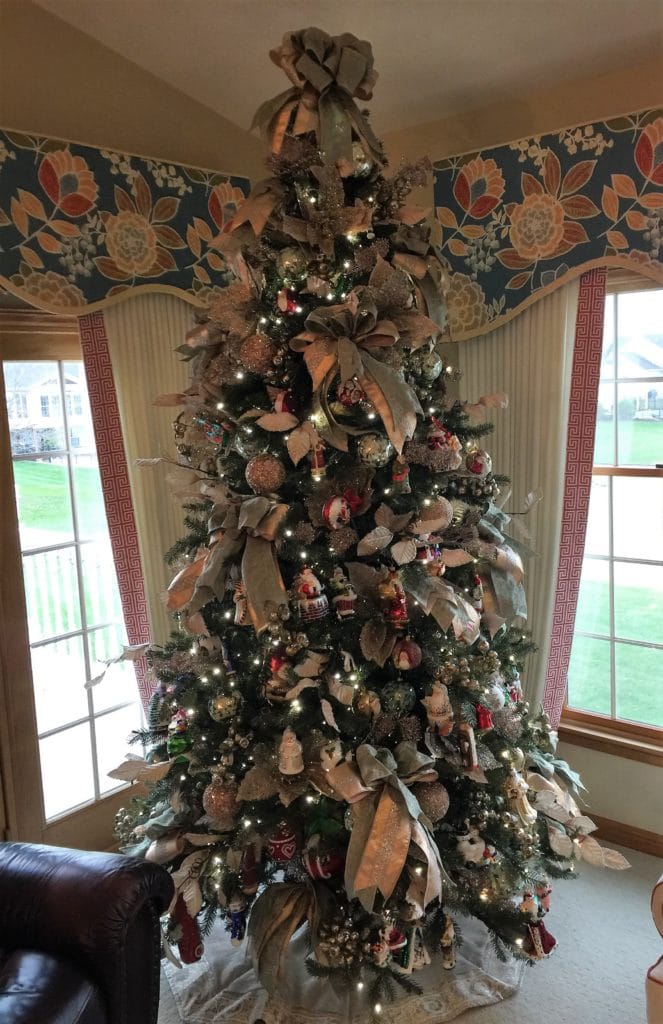
 We all want that right-out-of-the-magazine Christmas tree, right?
I can’t be the only one who spends the entire holiday season meticulously rearranging that one seemingly out-of-place ornament every time I walk through the room.
If you’ve ever wondered how to get that perfect tree – the one with the seamless layers of lights, florals, garland and ornaments – then read on. I’m here to tell you how to decorate your tree like an interior designer.
I’ll professionally decorate dozens of trees for my clients this holiday season, so I’ve got this down to a science.
Follow these seven steps and you’ll have a tree that looks pretty close to the work of a professional.
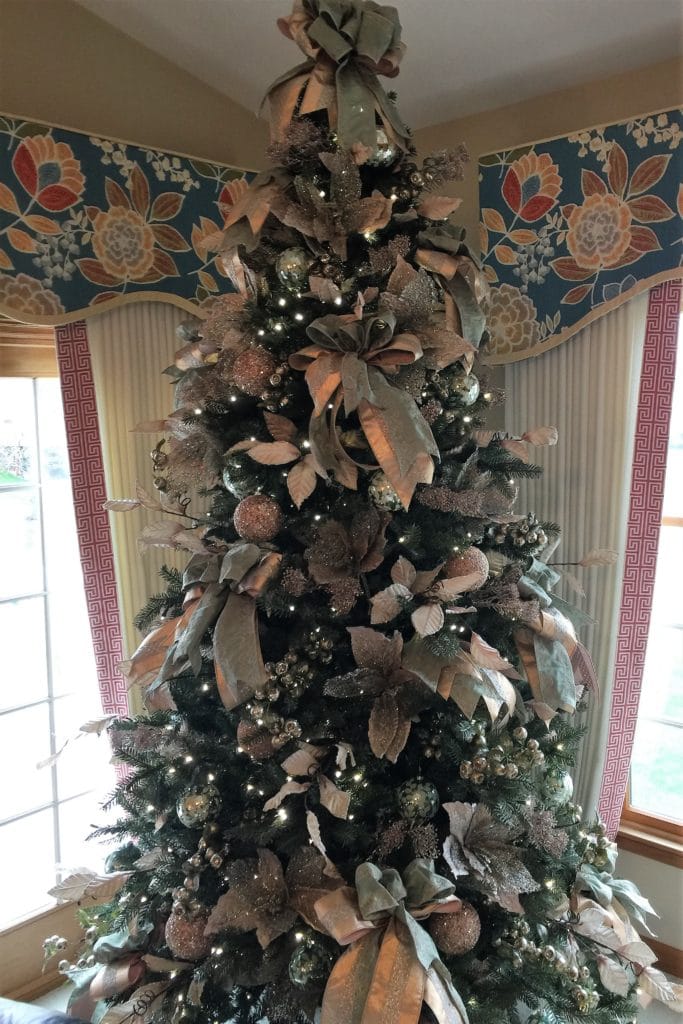
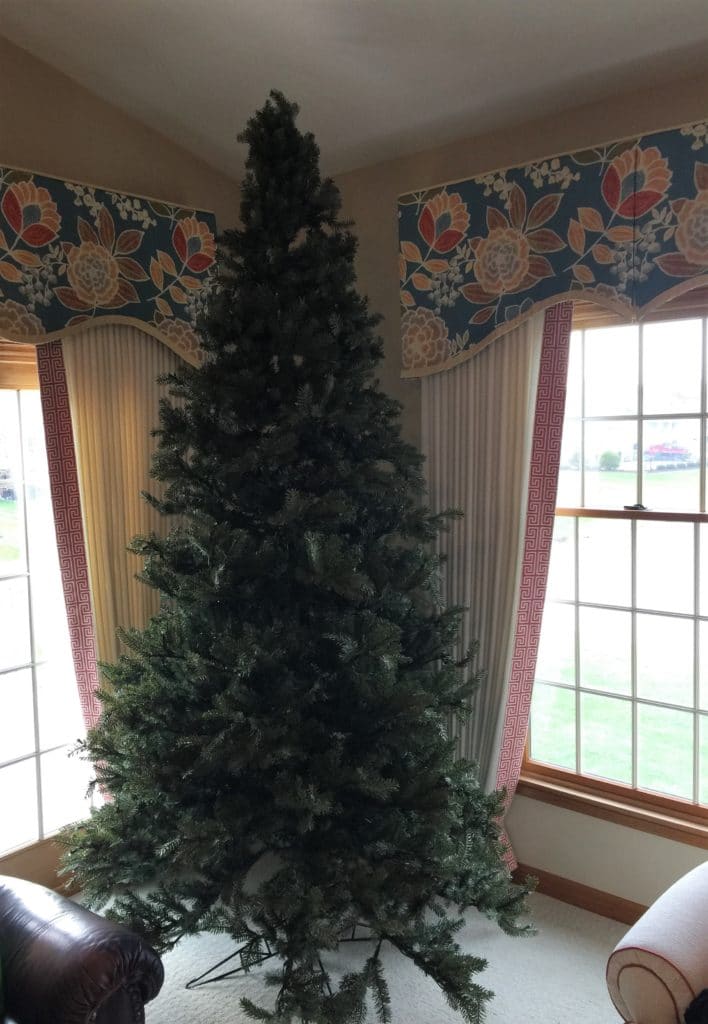 Step 1: Fluff the Tree
This is after your tree is assembled and you’ve checked the lights. I skipped those steps because let’s face it, those tedious bits don’t count as actually “decorating.” So now it’s time to fluff! Fluffing is the most important step! Make sure you wear a pair of gloves ….. your hands will thank you! Fluffing the tree is what helps your artificial tree take shape and look full after being store the other 9-11 months of the year. When you think you’re done, step back and make sure all the branches are separated and that there are no huge holes.
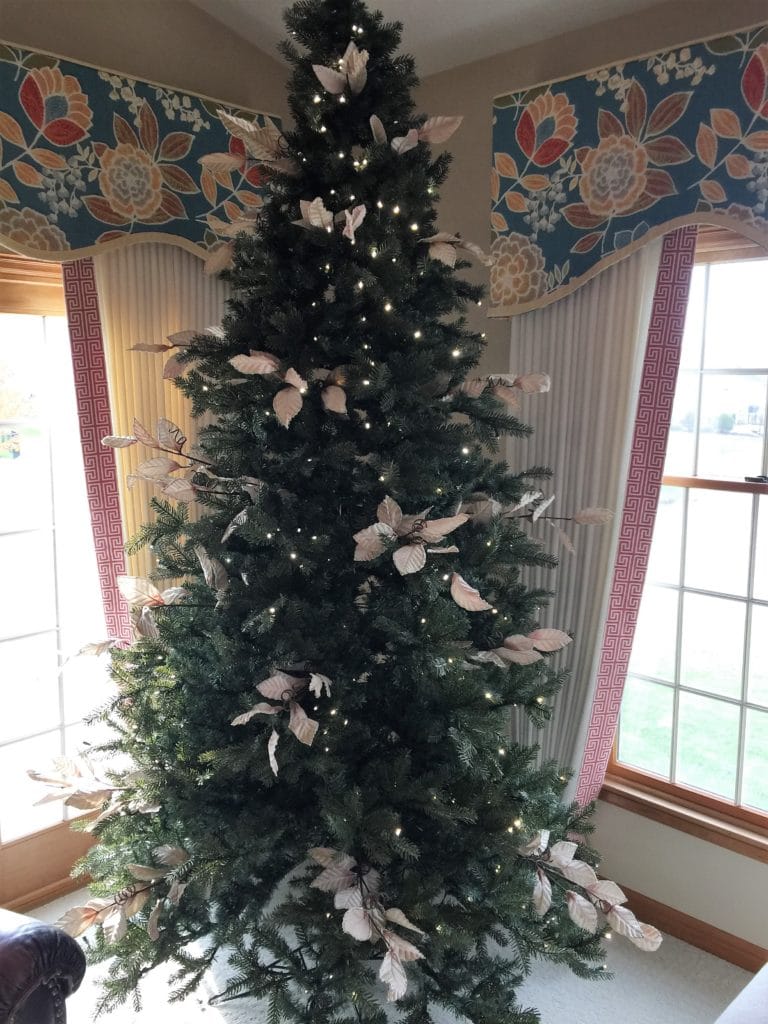 Step 2: Add Floral Piks
I love adding different types, textures and colors of florals piks. In this particular case I added some silver velvet leaves, a glittery Queen Anne’s lace, gold berries and a beautiful pale pink poinsettia. Florals add interest and depth to the tree, and layering them on before ornaments builds the tree out even more.
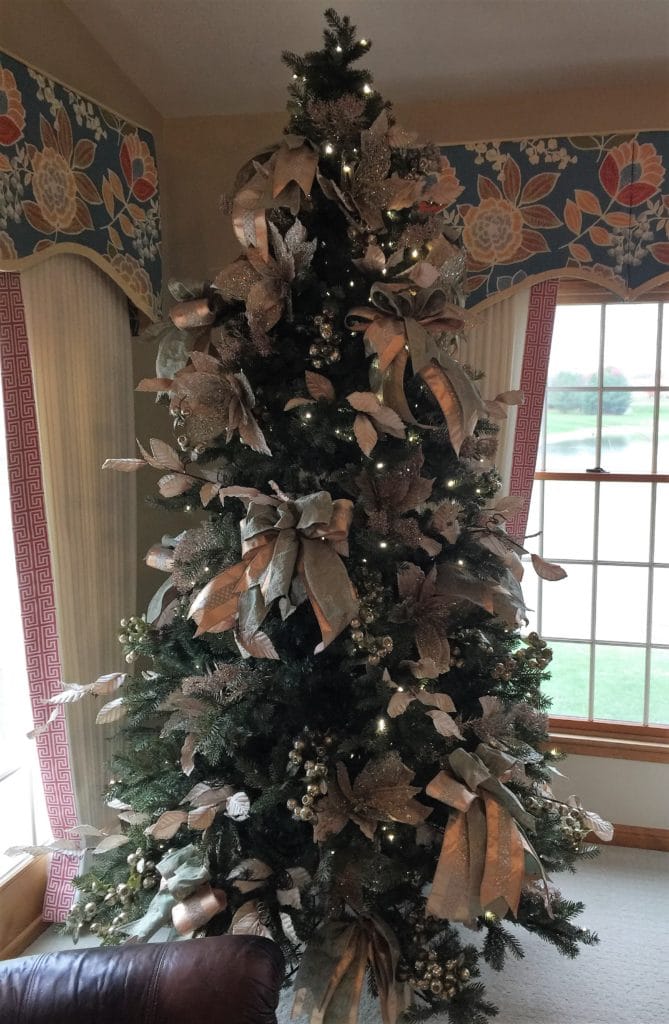 Step 3: Add the Ribbon and Bows
If you can make the bows yourself, obviously go that route. I made roughly 10 bows out of this rose color ribbon and paired it with Shaw green ribbon. Ribbon adds softness to the tree, and pulls the eye in a flowing pattern along the length of the tree. If you’re not the crafty sort, you can always buy beautiful bows and ribbons in a variety of patterns and styles at almost any craft or discount store.
 Step 4- Add the Standard Ornaments
Now it’s time for the glittery balls, the stars and the traditional ornaments that you have multiples of. These ornaments continue the color scheme of the tree. Place them strategically so that the pops of color draw the eye around the tree. For this tree, I bought some rose colored glittered balls and some sage glass balls.
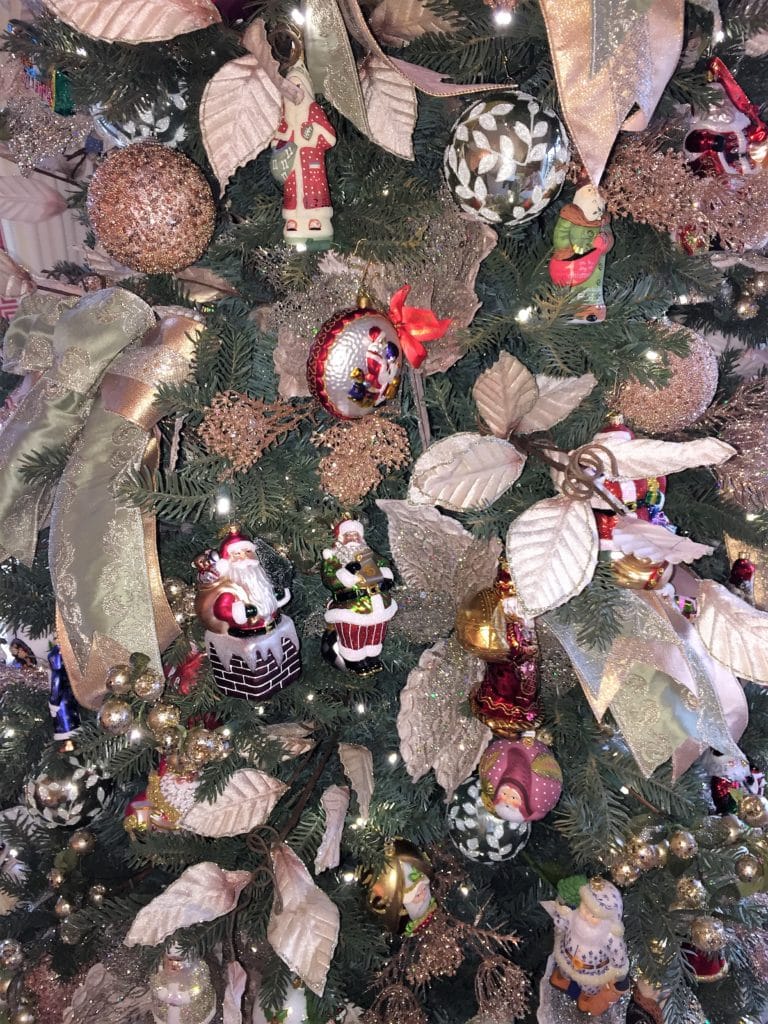 Step 5 – Bring in the Special Ornaments
This is when you add in the special touches, those ornaments that have meaning. My clients loves Christmas so she has seven – yes, seven – trees in her home. On the main tree she likes to display all of her special Santa ornaments. I mix those ornaments in with the others that match the theme of the tree and the overall look is beautiful!
Step 6 – The Tree Topper
You can make something big and flashy like an enormous, sparkly spray, or if your tree is busy with lots or ornaments, go with something simple like a bow
Step 7 – Choose a Tree Skirt
Select a tree skirt that complements the tree but doesn’t distract from it. We chose a neutral tree skirt with a silver border.
Follow these steps and with a little patience your tree can look designer fabulous for the holidays!
But as always, if you need a designer’s touch, I’m only an email away! Contact Jill at JSB Designs for all your interior design and holiday needs, jill@myjsbdesigns.com.